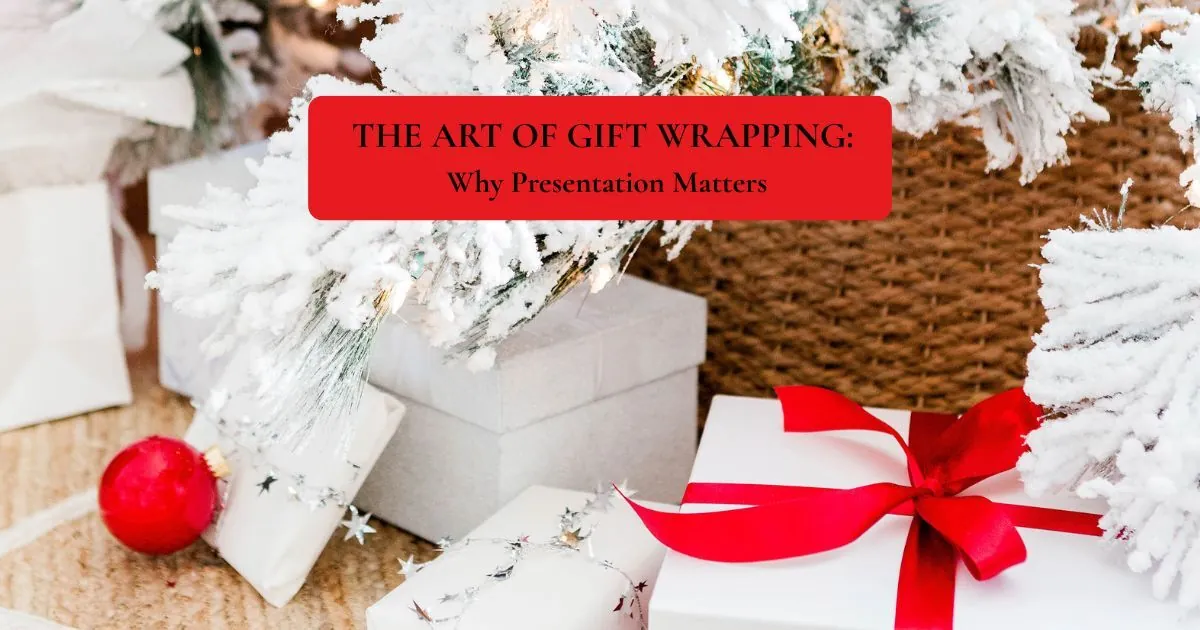
There’s something magical about receiving a beautifully wrapped gift. Before you even tear into the paper, that thoughtful presentation tells you something important: someone cared enough to make this moment special. In our world of rushed Amazon deliveries and gift bags stuffed with tissue paper, taking the time to wrap a gift beautifully has become a genuine act of love.
Whether you’re preparing party favors for your next gathering, wrapping hostess gifts, or want to elevate your gift-giving game, understanding the art of presentation can transform an ordinary gift into an unforgettable experience. Let’s explore why gift-wrapping matters, how to create a wrapping station that makes the process effortless, and the hottest trends that will make your presents the talk of any celebration.
Gift wrapping isn’t just about aesthetics, though I’ll admit, a gorgeously wrapped package is a feast for the eyes. The real magic happens in what that presentation communicates to the recipient.
Research shows that beautifully wrapped gifts increase the recipient’s enjoyment of what’s inside. That anticipation you feel when you see a carefully wrapped present. It’s building excitement and making the gift-opening experience more memorable. The wrapping becomes part of the gift itself, extending the joy beyond the moment they tear it open.
When you wrap a gift thoughtfully, you’re sending a clear message: “You matter to me. I invested time and creativity into this moment because you’re worth it.” In our fast-paced world where convenience often trumps thoughtfulness, that message resonates deeply.
If you’re someone who loves hosting gatherings and creating memorable experiences in your home, gift wrapping aligns perfectly with your entertaining philosophy. Just as you carefully select your party tablescape and plan your cocktail menu, presenting party favors, hostess gifts, or any gift with beautiful wrapping shows the same level of care and attention to detail.
Think about it: when you hand a dinner party guest a beautifully wrapped thank-you gift as they leave, you’re extending your hospitality beyond the evening itself. That wrapped present becomes a tangible reminder of the wonderful time they had at your table. When your friends and family can identify who left the gift under the tree or on the birthday gift table because of the way it is wrapped, that creates a memory your loved ones will cherish about you.
One of the biggest obstacles to beautiful gift wrapping is the hassle factor. When your supplies are scattered across three closets and you’re digging through drawers for scissors, the process becomes a chore instead of a creative outlet. The solution? A dedicated wrapping station that makes the entire process smooth and even enjoyable.
First, choose your space. You don’t need a huge area, even a corner of a guest room, a closet, or a section of your craft room works perfectly. The key is to have a flat surface where you can wrap without contorting yourself on the floor.
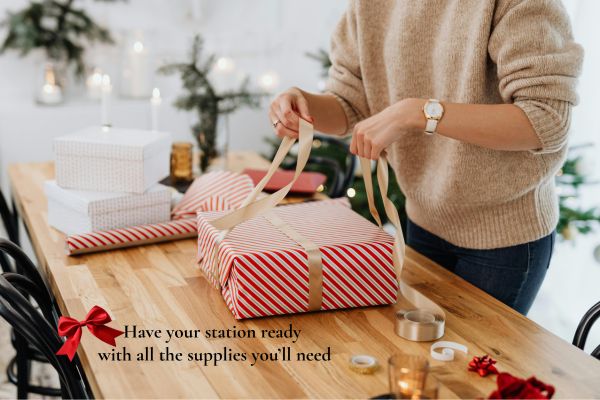
Building a well-stocked wrapping station means you’ll never be caught without ribbon at 10 PM the night before a party. Here’s what every wrapping station needs:
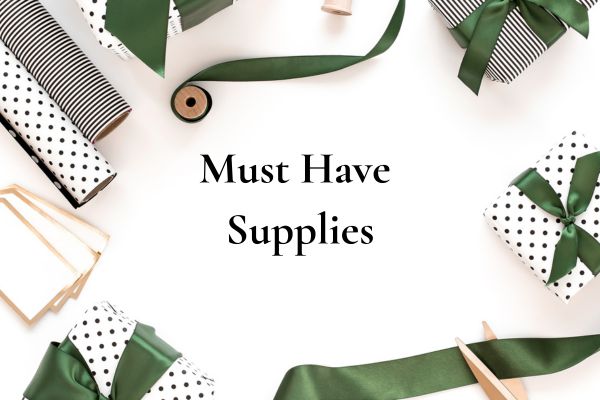
The difference between a wrapping station you’ll use and one that becomes cluttered chaos is organization. Consider these storage solutions:
For vertical paper storage: Use a tall wastebasket, umbrella stand, or install a wall-mounted paper holder. Keeping paper rolls upright prevents creasing and makes it easy to see all your options.
For ribbons: Thread spools onto a dowel rod, use a hanging organizer with clear pockets, or repurpose a wine rack to hold ribbon spools.
For small supplies: Drawer dividers, mason jars, or a tiered lazy Susan keep scissors, tape, and embellishments organized and visible.
For tags and cards: A small filing system or recipe card box keeps tags sorted by occasion or season.
For everything: If you are fortunate to have some extra wall space to hang a pegboard, hang one and use pegboard holders and hooks to take advantage of vertical storage off the floor. Insert two holders 24 inches apart or so and place a sturdy dowel rod right on top of them. Run the dowel rod through the hole in the center of your ribbon so that your ribbon is all visible and easily accessible. Hang scissors and containers with handles for gift tags, stamps, pens, and embellishments.
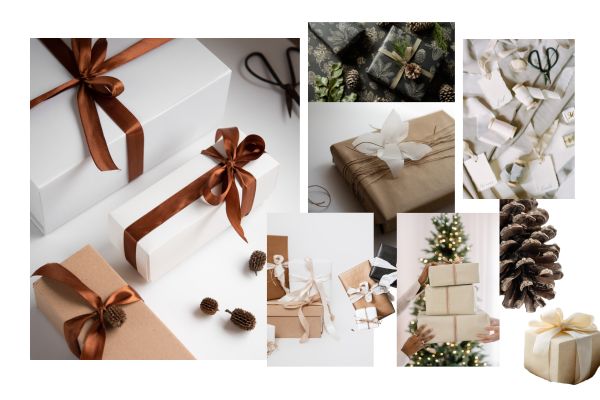
Gift wrapping trends have evolved beautifully in recent years, moving away from overly commercial looks toward more thoughtful, sustainable, and personalized approaches. Here are the trends that are elevating gift presentation right now.
Sustainability has moved from trend to standard practice in gift wrapping, and for good reason. Using recycled and repurposed materials isn’t just eco-friendly; it often creates more interesting, unique presentations than traditional paper.
The beauty of recycled materials is that each wrap becomes one-of-a-kind. No two gifts look identical, and there’s a story behind each choice.

Bringing the outdoors in isn’t just for your party tablescapes—it’s transforming gift wrapping too. Natural materials add texture, fragrance, and organic beauty that synthetic ribbons simply can’t match.
These elements work beautifully with kraft paper or neutral wrapping, creating a sophisticated, garden-inspired look that feels both elegant and effortless.

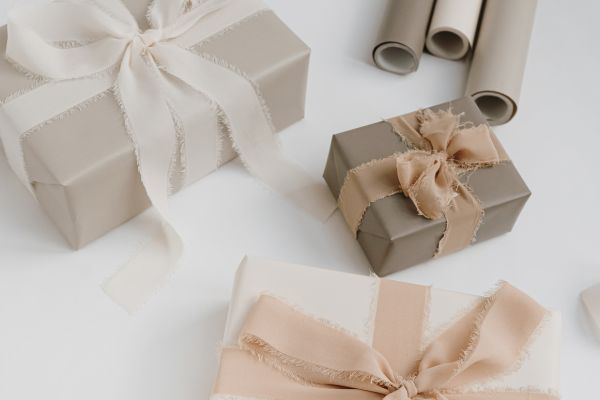
One of the most striking trends in gift wrapping is the monochromatic approach, using varying shades and textures within a single-color family. This creates a cohesive, designer look that’s surprisingly easy to achieve.
The monochromatic trend is perfect for creating a cohesive gift display under a tree or on a party gift table. Imagine all your wrapped favors in various shades of green with natural elements; it creates a stunning display.
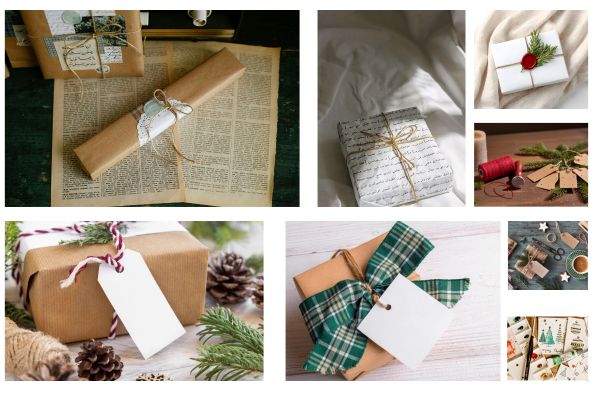
In our digital age, anything handwritten feels extra special. Personalizing your gift wrap with hand-drawn elements, calligraphy, or custom stamps makes each present truly unique.
Why use one ribbon when you can use three? The layered approach to gift wrapping creates depth and visual interest by combining multiple elements.
As a party host and someone who values creating beautiful moments in your home, gift wrapping can become one of your signature touches. Whether you’re preparing thank-you gifts for dinner party guests, wrapping favors for a cocktail party, or simply presenting a hostess gift, your presentation style becomes part of what you will be known for and remembered by.
You’re busy planning menus, setting tablescapes, and perfecting your cocktail recipes. Here’s how to make gift wrapping efficient:
Wrap in batches: If you’re preparing party favors, set up an assembly line. Cut all your paper, tie all your ribbons, and attach all your tags in separate steps rather than completing each gift individually.
Keep a wrap-ahead stash: Wrap a few empty boxes in your favorite styles and sizes. When you need a last-minute hostess gift, simply open the bottom, insert your gift, and reseal.
Develop a signature style: Choose 2-3 go-to color combinations or wrapping styles that you love. This makes purchasing supplies easier and creates a recognizable aesthetic.
Prep seasonal supplies: Before holidays or busy entertaining seasons, stock your wrapping station with appropriate materials so you’re never scrambling. Better yet, stock up at the end of holiday or seasonal sales.
Gift wrapping fits naturally into a lifestyle that values hospitality, entertaining, and creating memorable moments. When you treat gift presentation with the same care you give to your party planning and tablescapes, you’re extending your hosting philosophy to every aspect of the celebration.
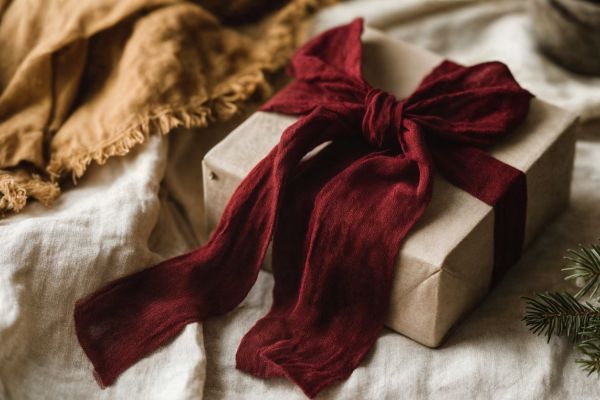
Think of gift wrapping as the final touch on your entertaining experience, like the garnish on a beautiful cocktail or the fresh flowers on your table. It doesn’t have to be elaborate or expensive. Sometimes the most meaningful presentations are the simplest: kraft paper, a sprig of fresh herbs from your kitchen, and a handwritten tag.
Ready to create your own gift-wrapping station? Here’s where to start:
Step one: Choose your location and measure your space. Knowing your dimensions helps you select the right storage solutions.
Step two: Gather your current supplies from wherever they’re hiding around your home. Take inventory of what you have before purchasing new materials.
Step three: Invest in quality basics: good scissors, tape and a holder with a weighted base, kraft paper, and neutral ribbon. These work for any occasion and form the foundation of your collection.
Step four: Add personality with embellishments that reflect your style. If you love organic, stock up on twine and dried florals. If you prefer modern minimalism, focus on monochromatic ribbons and clean lines.
Step five: Organize everything using vertical storage for paper, clearly labeled containers for small items, and an accessible system for ribbons and embellishments.
Step six: Use your station! The more you wrap, the faster and more creative you’ll become. It is really very therapeutic.
For your convenience, I have included links to a few of the essentials you need for your wrapping station (these are affiliate links from which I may earn a very small commission at no extra cost to you).
Beautiful gift wrapping isn’t about perfection or spending a fortune on fancy supplies. It’s about adding an extra layer of thoughtfulness to your gift-giving and creating moments that make people feel genuinely special. When someone receives a thoughtfully wrapped gift from you, they’re experiencing your care before they even see what’s inside.
Whether you embrace the sustainable trend with recycled papers and natural elements, go monochromatic for a designer look, or develop your own signature style, the key is making the process work for your life. With a well-organized wrapping station and a few go-to techniques, you’ll be ready to present beautiful gifts for every party, celebration, and hostess opportunity that comes your way.
So, carve out that corner for your wrapping station, stock it with supplies that spark your creativity, and start wrapping. Your friends and family will thank you for it.
What’s your signature gift wrapping style? Do you have a wrapping station set up in your home, or are you inspired to create one? Share your favorite wrapping hacks and trends in the comments below!